
When an Air Compressor runs but the tank pressure barely rises, the cause may be simpler than a failed pump. A steady motor hum can hide a leaking fitting, a clogged intake filter, or a valve that is not sealing properly. Sometimes the clue is a faint hiss near the regulator. Sometimes it is a pressure gauge that seems stuck. Small signs matter.
A useful diagnosis starts with observation, not guesswork. Note how quickly pressure builds, whether the motor cycles normally, and whether the tank loses pressure after shutdown. Check accessible hose connections and the intake filter, then compare gauge readings with the compressor’s manual. It is easy to blame the pump too soon. Worn piston rings, damaged valves, or a faulty unloader can also reduce output, but these parts need careful inspection. A loose belt or slipping drive may be another possibility on belt-driven models.
Safety comes first. Before opening the unit, disconnect power and release stored air as the manufacturer directs. Never loosen a pressurized fitting or tank connection. If basic checks do not reveal the problem, stop and seek help from a qualified technician. This guide explains common causes, practical checks, and signs that point to a more serious repair. The diagnosis may not be perfect on the first try, and that is worth acknowledging. Careful notes and one change at a time make troubleshooting more reliable.
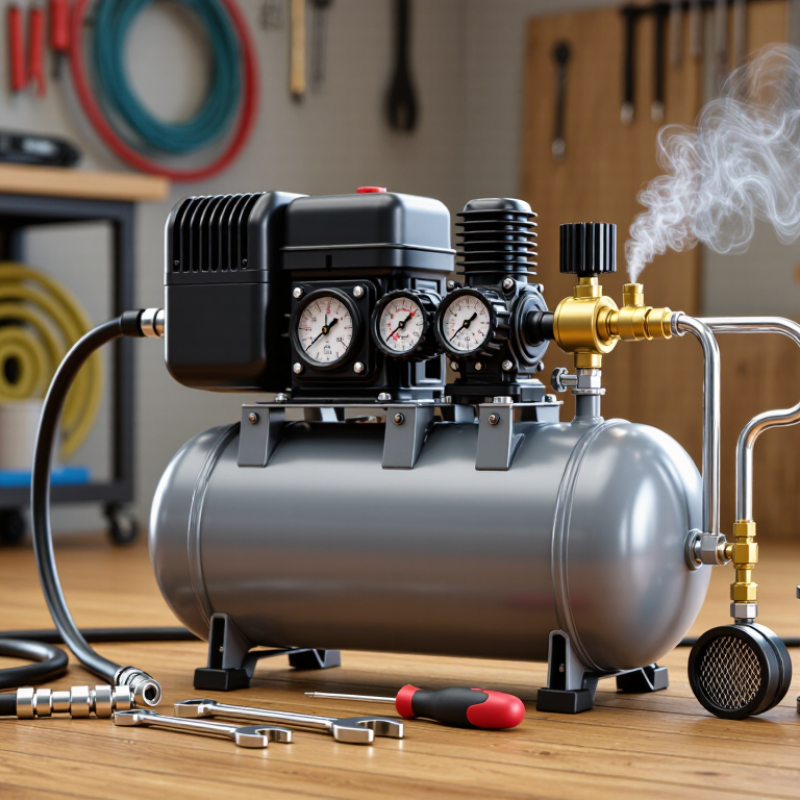
Why Is My Air Compressor Not Building Pressure?
How an Air Compressor Builds Pressure
An air compressor builds pressure by drawing in air, squeezing it, and storing it in a receiver tank. In a piston model, the motor turns a crankshaft that moves the piston inside a cylinder. On the downstroke, air enters through the intake valve. On the upstroke, the piston compresses that air and pushes it through a discharge valve into the tank. The valves must seal well; even a small leak can reduce output.
The tank stores compressed air for tools. A check valve helps stop tank air from flowing back into the pump, while a pressure switch turns the motor off at its set limit and back on as pressure falls. The regulator controls pressure going to a tool, not pressure inside the tank. That distinction is easy to miss.
If the gauge rises slowly or stops, listen near fittings and the tank drain for a steady hiss. Check that the drain is closed and the intake filter is clear. A worn valve, loose belt, or damaged seal may also limit compression. Small clues matter. I would not assume the pump is worn out just because one gauge looks low; gauges can fail, and regulators can be set incorrectly. Unplug the unit and release stored air before inspecting parts.
A compressor that runs but slowly raises tank pressure usually has a leak, restricted airflow, or worn internal parts. Check that the tank drain is closed, then inspect couplers and hoses. Listen for a steady hiss. The U.S. Department of Energy’s Improving Compressed Air System Performance sourcebook reports that poorly maintained industrial systems commonly lose 20–30% of compressor output through leaks. That figure is not a direct estimate for every small workshop compressor, but it shows how quickly leaks can consume available airflow.
A clogged intake filter can starve the pump, while a slipping belt may prevent it from reaching operating speed. Worn piston rings or leaking inlet and discharge valves can also reduce compression. A stuck unloader or faulty tank check valve may release air near the pressure switch or tank inlet. Look for these clues, but don’t assume one symptom proves the cause. A gauge can mislead, too; compare it with a known-good gauge before replacing parts.
Test fittings with soapy water and watch for growing bubbles. If pressure rises with no tools connected but stalls during use, demand or a leak may be overwhelming the compressor’s capacity. If pressure barely rises even with the outlet closed, the pump or its controls may need inspection. Disconnect power and fully depressurize the tank before servicing components. Small details matter. The exact pressure behavior is worth noting before calling a technician.
Why Is My Air Compressor Not Building Pressure?
A compressor that runs but barely raises tank pressure needs a careful diagnosis. Watch the tank gauge for several minutes. If pressure rises slowly, then stalls, air may be escaping or the pump may be struggling. Listen near fittings, the drain valve, and hose connections for a steady hiss. Before inspecting anything, switch off and unplug the unit, then release tank pressure. Never loosen a pressurized fitting.
Check the intake filter for dust or blockage; restricted airflow can reduce output. Look for cracked hoses, loose connections, or a drain valve that does not seal. If the tank holds pressure but the compressor cannot keep up with a tool, the tool may require more airflow than the compressor supplies. A slow pressure rise can also point to worn pump parts, damaged valves, or a faulty check valve. These problems are harder to confirm without the service manual, so don’t guess at internal repairs.
Tips: Note the starting and stopping pressures, and compare them with the manual. Use soapy water on suspected external leaks; growing bubbles reveal escaping air. Small leaks are easy to miss. If pressure keeps falling after basic checks, stop using the compressor and ask a qualified technician to inspect it.
| Observed Symptom | Likely Cause | How to Check | Practical Next Step |
|---|---|---|---|
| Pressure rises slowly, or the compressor runs longer than usual. | Air leak at a hose, fitting, tank drain, or connected tool. | With the compressor off and the tank pressurized, listen for escaping air. Apply soapy water to accessible joints and look for growing bubbles. | Repair or replace the leaking connection or hose. Close the drain valve fully; replace it if it does not seal. |
| Airflow at the intake seems restricted, and the pump takes longer to fill the tank. | Dirty, blocked, or damaged intake filter. | Switch off and unplug the compressor, then inspect the filter according to the owner’s manual. | Clean or replace the filter with the specified type. Do not operate the compressor with the intake left unfiltered. |
| The motor runs, but the belt-driven pump turns slowly or intermittently. | Loose, worn, or slipping drive belt. | Disconnect power and inspect the belt for wear, damage, or excess slack. Check alignment using the manufacturer’s instructions. | Adjust or replace the belt as directed. Keep hands clear of belts and pulleys, and never inspect them while the unit is running. |
| Pressure stalls below the normal range; the pump may make unusual intake or discharge noises. | Leaking or damaged inlet or discharge valve components. | After isolating power and fully relieving tank pressure, have the pump valve assembly inspected using the service procedure for that model. | Replace damaged valve components with the correct parts. Internal pump work may require a qualified technician. |
| The compressor runs continuously, and pressure builds poorly despite no obvious external leak. | Worn piston rings, cylinder, or pump gasket. | Check for persistent low output and excessive oil carryover or abnormal crankcase blow-by, following the owner’s manual. | Arrange pump inspection and repair. Stop using the unit if it overheats, makes severe knocking noises, or shows signs of major damage. |
| The pump stops before reaching its usual cut-out pressure, or the motor repeatedly starts and stops. | Pressure-switch setting or sensing problem, electrical supply issue, or motor overload. | Compare the gauge reading with the pressure-switch specifications. Check that the unit is connected to the correct supply and that the circuit is not overloaded. | Do not alter pressure-switch settings or bypass electrical protections. Have the switch, wiring, or supply checked by a qualified technician. |
| Air escapes from the unloader area after the motor stops, or the compressor struggles to restart. | Unloader valve or check valve not sealing correctly. | Observe whether the brief release after shutdown stops promptly. Persistent hissing or difficulty restarting may indicate a fault. | Isolate power and depressurize the system before servicing. Have the unloader or check valve cleaned, repaired, or replaced as specified. |
| The gauge reading appears inconsistent with the compressor’s performance. | Faulty pressure gauge or blocked gauge connection. | Compare the reading with a suitable, known-good gauge using a compatible, correctly rated connection. | Replace a faulty gauge with one that matches the equipment’s pressure range and connection requirements. |
Safety: Switch off and disconnect power before inspection or service. Relieve stored air pressure before opening any component. Never exceed the tank’s rated pressure, and never adjust, disable, or obstruct the safety relief valve.
Why Is My Air Compressor Not Building Pressure?
Start with the simplest check: confirm the tank drain is closed and the outlet valve is not leaking. Listen around fittings, hoses, and the drain for a steady hiss. Brush on soapy water; growing bubbles reveal escaping air. The U.S. Department of Energy’s Improving Compressed Air System Performance: A Sourcebook for Industry reports that leaks can waste 20–30% of compressor output. A small leak can matter. Switch off and unplug the unit before tightening connections or opening components, and fully release tank pressure before servicing.
If no leak appears, watch the tank gauge while the compressor runs. Compare it with a second, suitable pressure gauge if readings seem unreliable. Check whether the intake filter is clogged, then inspect accessible gaskets and valves for damage, following the service manual. A worn piston seal or faulty reed valve may let air escape back through the pump. A failed check valve can also cause pressure loss or air to leak near the tank inlet. It is tempting to blame the motor, but a loose fitting is often easier to miss.
Tips: Keep hands clear of moving parts. Clean or replace a dirty intake filter as directed. If pressure stalls despite sealed connections, or the pump becomes unusually hot, stop the unit and seek qualified service. Don’t keep running it to “see what happens”; that can make diagnosis harder.
Example tank-pressure test — compare how pressure rises over time to help spot a leak or a possible intake-valve problem.
These curves are illustrative, not universal specifications. Pressure-rise rates vary with the compressor, tank size, and operating conditions. Check your unit’s rated cut-out pressure. If pressure rises slowly, switch the compressor off and check for leaks; persistent slow buildup may indicate a faulty intake or valve component. Never exceed the tank’s rated pressure.
A compressor that runs but will not build pressure may have a simple leak or a costly internal fault. Listen near fittings and the drain valve for escaping air, and check whether the intake filter is clogged. Before inspecting anything, switch off and unplug the unit, then release stored air. Never loosen a pressurized fitting.
Repair often makes sense when the problem is a worn gasket, faulty check valve, loose connection, or damaged pressure switch. A qualified technician can test these parts and measure how quickly the tank fills. That evidence is more useful than guessing from the motor’s sound alone. Not always obvious. If the cylinder is scored, the pump overheats repeatedly, or the motor has failed, repair costs may approach the price of a suitable replacement. Extensive rust on the tank is a serious warning; do not keep using it. Tank damage can make continued operation unsafe.
Compare the full repair estimate with the cost of a new compressor that meets your air-flow needs. Include parts availability, expected downtime, and the condition of the tank and motor. A modest unit used only for occasional inflation may not justify a major pump rebuild. For frequent shop use, a durable repair could be worthwhile. The choice can still feel uncertain, so ask for the diagnosis and estimate in writing.
The piston draws air through an intake valve, compresses it, and pushes it into the tank. Small valves matter.
Air may be escaping, or the pump may be struggling. Listen near fittings, hose connections, and the drain for a steady hiss.
Check for a clogged intake filter, cracked hose, loose connection, or drain valve that does not seal. Bubbles in soapy water can reveal an external leak.
No. The pressure switch controls when the motor stops and starts. The regulator sets pressure flowing to a tool. Easy to confuse.
The tool may need more airflow than the compressor can supply. Compare the tool’s needs with the compressor’s specifications.
Switch it off, unplug it, and release stored air. Never loosen a pressurized fitting. Please don’t skip this.
Repairs may make sense for a worn gasket, faulty check valve, loose connection, or damaged pressure switch. Ask a qualified technician to test the parts and provide an estimate.
Consider replacement if major pump or motor damage makes repair costly. Extensive tank rust is a serious warning; stop using the unit and seek qualified advice.
An Air Compressor builds pressure by drawing in air, compressing it inside a pump, and storing it in a tank until the system reaches its set limit. If pressure rises slowly or not at all, the cause may be a leak, a clogged intake filter, worn pump components, a faulty pressure switch, or a problem with the tank’s check valve. Understanding how these parts work together can make it easier to narrow down the source of the trouble.
Start diagnosis by checking the pressure gauge, power supply, and visible connections, then listen for escaping air and inspect hoses, fittings, valves, and the drain plug. With the compressor turned off and safely disconnected, clean or replace a dirty filter and look for damaged seals or worn parts. If a simple repair restores normal pressure, the unit may remain useful; if major components are badly worn or repairs are frequent and costly, replacement may be the more practical choice.